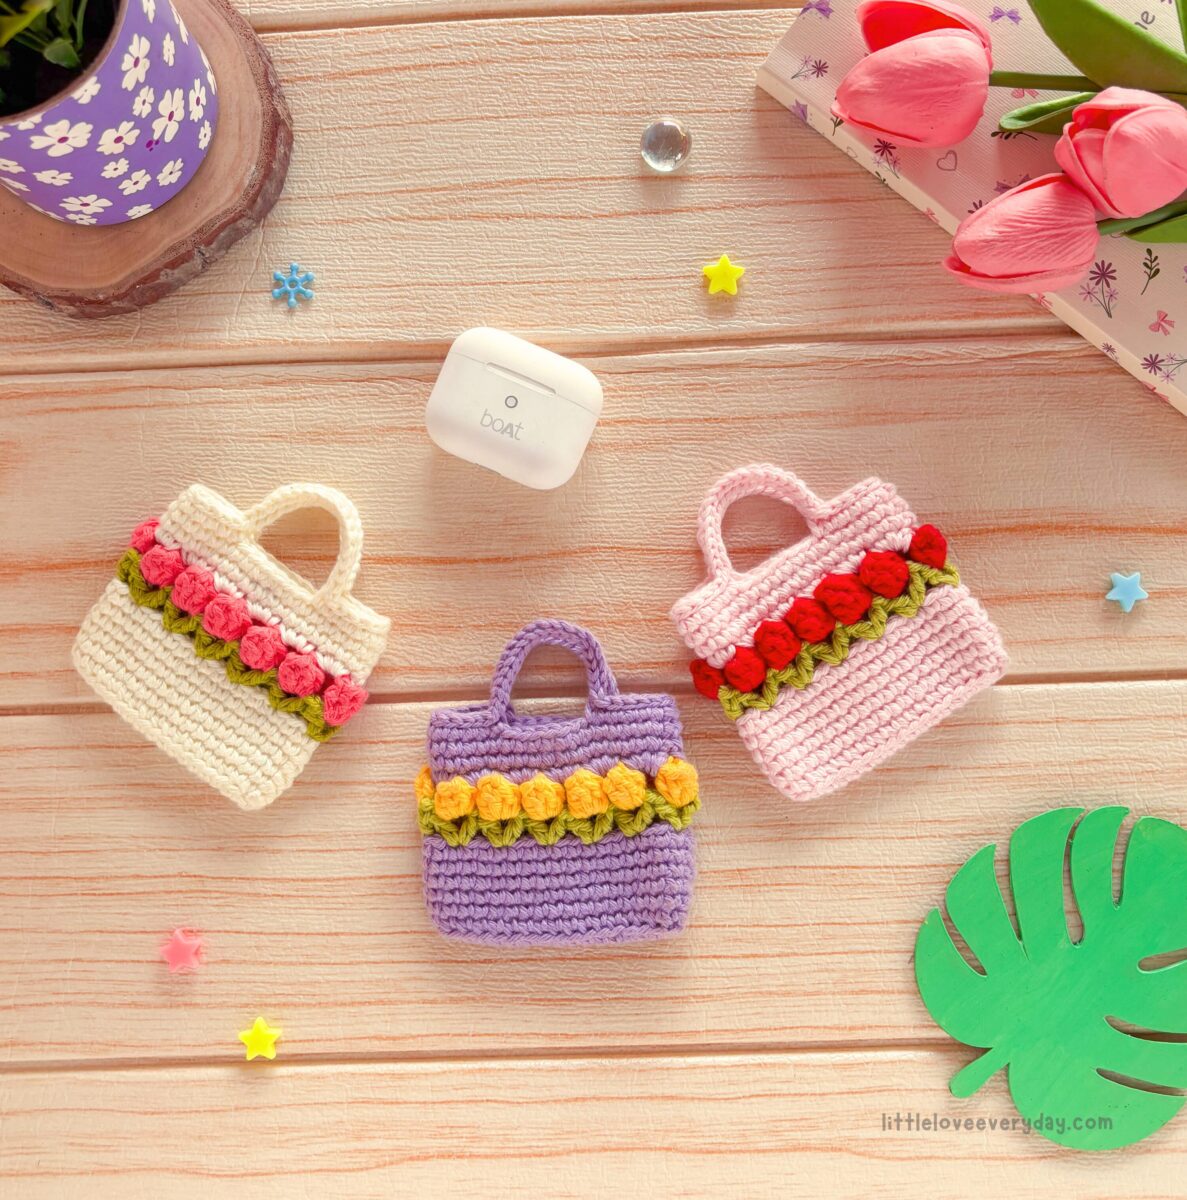
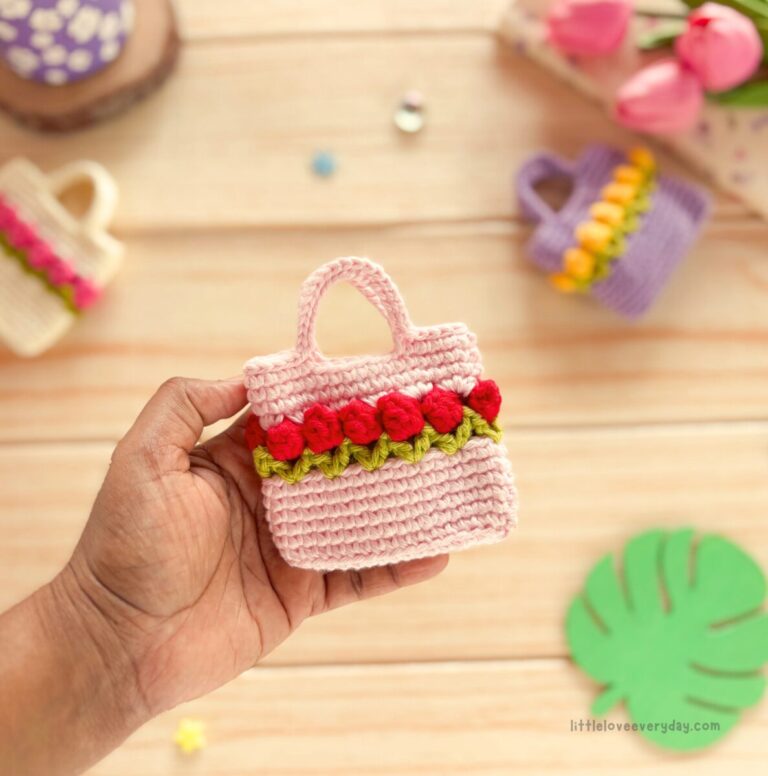
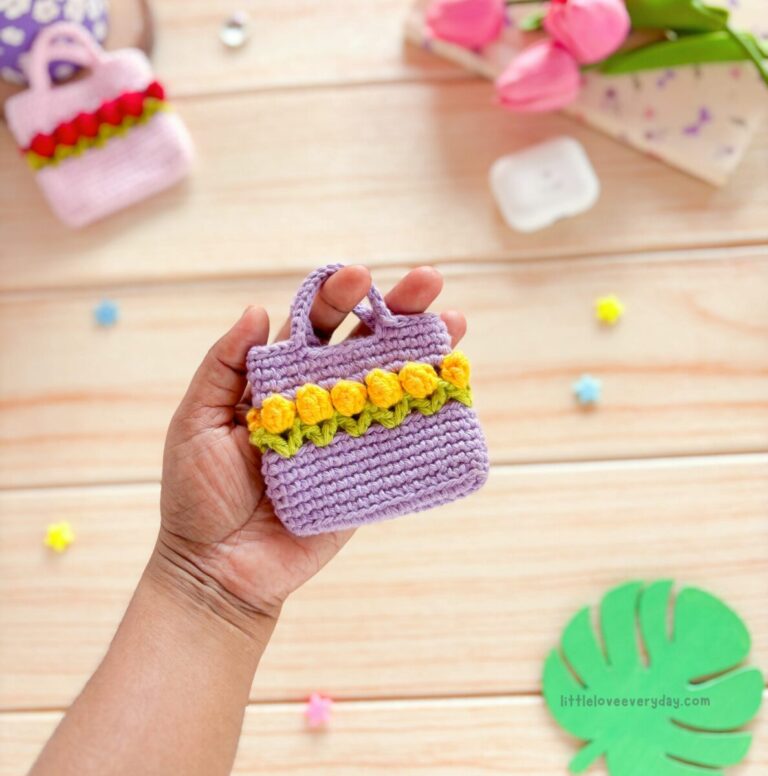
If you love small crochet projects that are both cute and practical, you’ll enjoy making this Tulip coin purse. This Tulip coin purse works up quickly and is perfect for holding coins or a cute Airpods case.
Please note: All content, including the pattern instructions and photographs, is the exclusive property of A little love everyday. This pattern is for personal use only. Please do not redistribute, sell, or reproduce this pattern, in whole or in part, electronically or physically. You are welcome to sell finished items made from this pattern, provided you credit the design to Anitha of ‘A little love everyday’.
You can buy the inexpensive ad-free PDF version of this pattern from my Etsy store.
Materials needed:
- DK weight cotton yarn in 3 colours:
- Main colour – Purse body
- Green – for leaves
- Tulip colour – for flowers
- 3 mm crochet hook
- Stitch marker
- Yarn needle and scissors
- Press button/ Snap fasteners (optional)
Stitches/ Abbreviations
- R – round/ row
- ch – chain
- st(s) – stitch(es)
- sc – single crochet
- dc – double crochet
- inc – increase (2 sc in same stitch)
- sl st – slip stitch
- PC – popcorn stitch
- BLO – Back loops only
- […] – repeat the instructions given in between the brackets
- (…) – total number of stitches
Popcorn stitch (PC) explained:
Work 5 double crochet into the same stitch, drop the loop from your hook, insert the hook into the first dc, pick up the dropped loop from the back and pull it through.
When a popcorn stitch is made at the beginning of a round, start with ch 3 (counts as 1 dc), then work 4 dc into the same stitch. Insert the hook into the third chain of the ch 3, pick up the dropped loop and pull it through.
Pattern Notes:
This pattern is worked in joined rounds.
Each round begins with ch 1 (does not count as a stitch) and ends with a sl st joined to the first single crochet of the round, unless stated otherwise.
Work the first stitch of each round into the same stitch as the ch 1.
Note:
Place a stitch marker in the first stitch (not the ch 1) at the beginning of each round. This will help you identify where to join at the end of the round and avoid confusion.
The ch 1 and sl st do not count as stitches and are not included in the stitch count.
Size Adjustment Tip:
To adjust the width of the purse, increase or decrease the foundation chain. Ensure the total number of chain is a multiple of 3.
Purse instructions:
Using main colour,
R1: Ch 18. Starting in second chain from the hook, sc 16, 3 sc in last ch. Working along the opposite side of the foundation chain, Sc 15, inc in last ch. Sl st to the back loops of the first sc (36).
R2: (BLO) Ch 1, sc in each st around, sl st to first sc (36).
R3-7: Ch 1, sc in each st around, sl st to first sc (36).
Fasten off. Switch to green colour.
R8: Ch 5, dc in first stitch of R7, [ skip next 2 sts, (dc, ch2, dc) in next st ] x 11.
Sl st to the 3rd ch of the starting ch 5 to join. Fasten off.
Switch to tulip colour.
R9: Join Tulip colour in the first ch-2 space,
Make (PC, ch 2) in the same space and in each ch-2 space around.
Sl st to the top of the first popcorn stitch to join. Fasten off.
You will have 12 popcorn stitches.
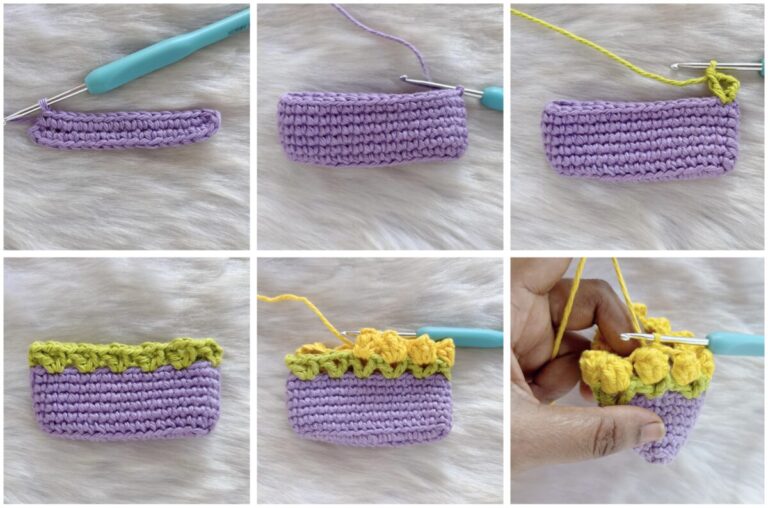
R10: Join main colour in the ch-2 space between the first and second popcorn stitches, ch 1, sc 3 in the same space, sc 3 in each ch-2 space around. Sl st to the first sc (36).
R11-12: Ch 1, sc in each st around, sl st to the first sc (36).
R13: Ch 1, sc 6, ch 18 (for handle), skip next 6 sts, sc 12, ch 18 (for handle), skip next 6 sts, sc 6. Sl st to the first sc.
R14: Sl st in each st and along the chains around. Fasten off and weave in all the ends.
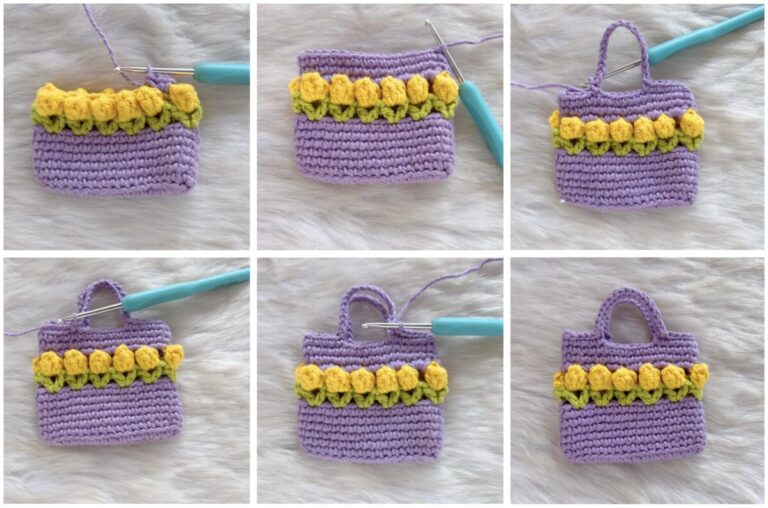
Finally, attach press buttons to the inside of the purse using sewing or embroidery thread, if desired.
And that’s it! Your Tulip coin purse is now complete and ready to use.
Click below image to save this pattern on Pinterest

Looking for more flower makes? Check below free patterns