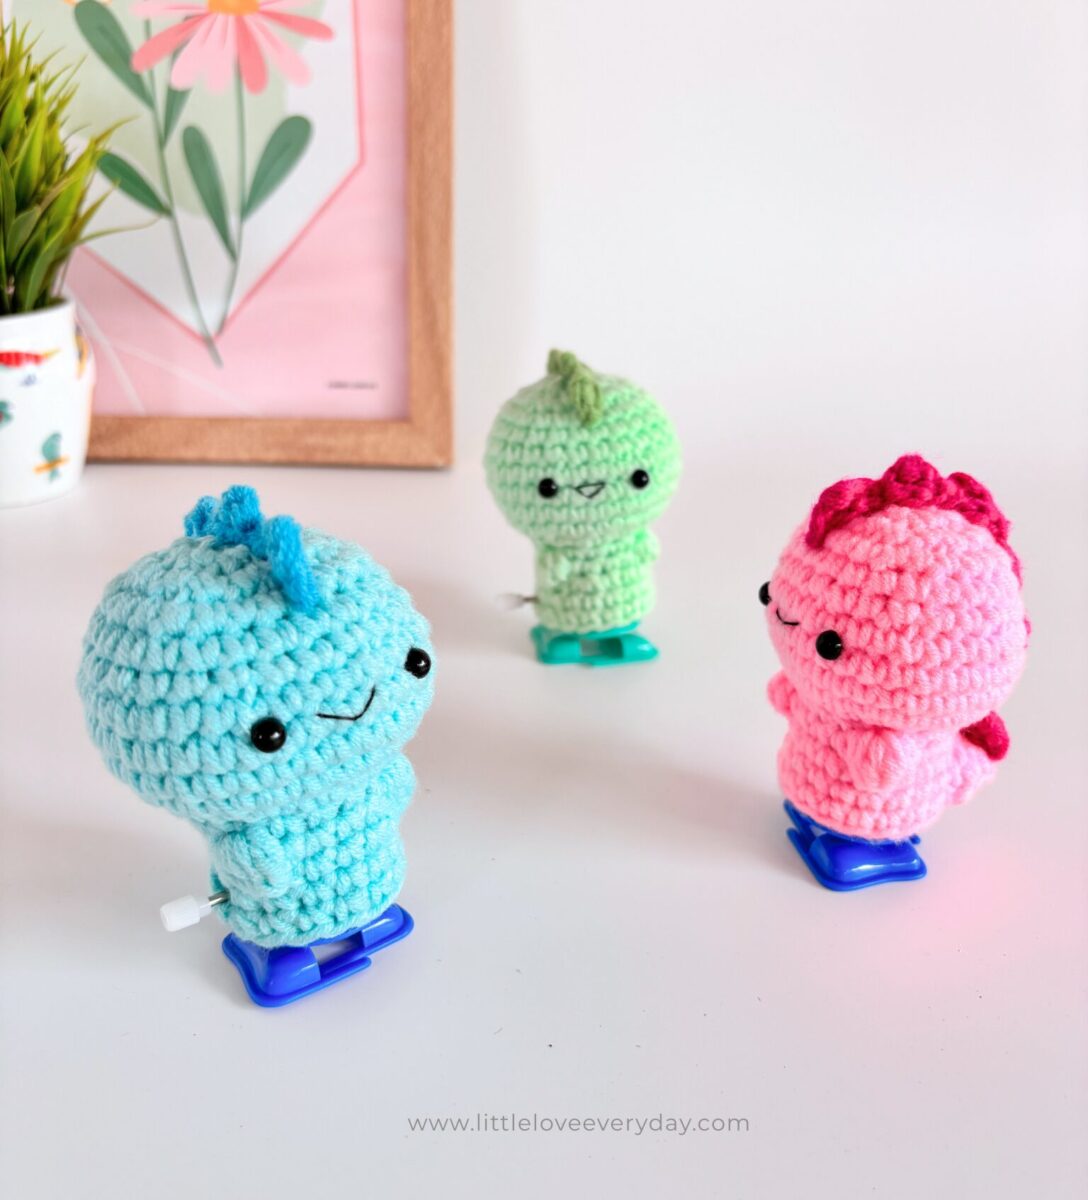
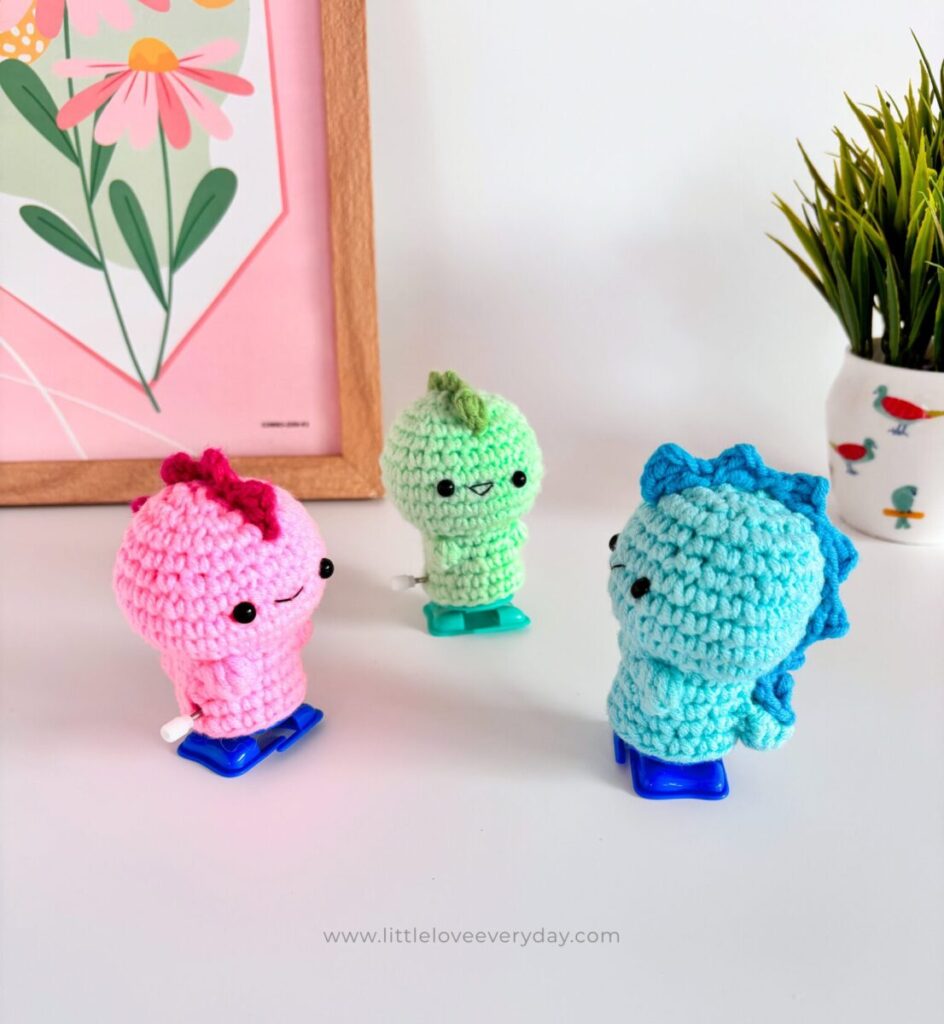
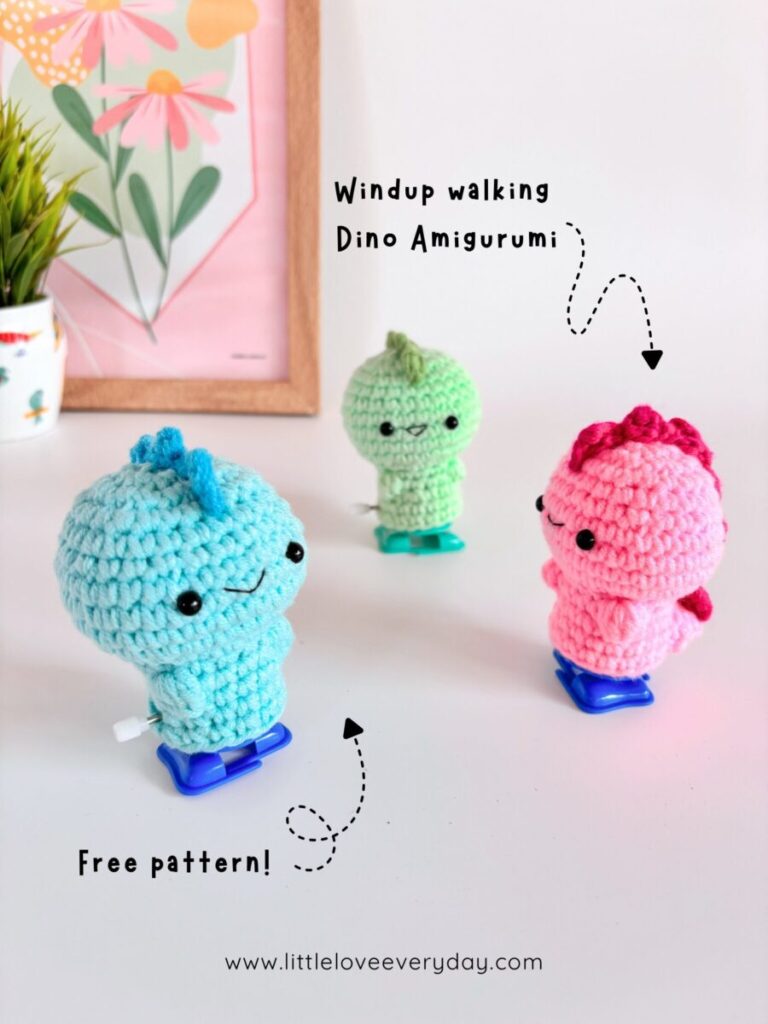
Are you the kind of person who loves amigurumi and hopes to make it more creative and functional? Then this wind-up walking Amigurumi Dino is the perfect project for you!
Designed to fit over a wind-up mechanism, this tiny dinosaur transforms into an adorable moving toy that brings handmade charm and playful personality together.
Please note:
All content, including the pattern instructions and photographs, is the exclusive property of A little love everyday. This pattern is for personal use only. Please do not redistribute, sell, or reproduce this pattern, in whole or in part, electronically or physically.
You are welcome to sell finished items made from this pattern, provided you credit the design to Anitha of ‘A little love everyday’.
Materials needed:
- 5 Ply milk cotton yarn in light and dark blue colour
- 3 mm crochet hook.
- Fiberfill for stuffing.
- 6 mm safety eyes.
- Wind up toy machine.
- Black embroidery thread and needle.
- Yarn needle, stitch markers and scissors.
I got my Diy Wind-up walking toy from threadshop.in
Stitches/Abbreviations
- R – round/row.
- Ch – chain.
- St(s) – stitch(es).
- Sc – single crochet.
- Dc – double crochet.
- BO – bobble stitch.
- BLO – Back loops only.
- FLO – front loops only.
- Inc – increase (2 sc in one st).
- Dec – decrease (sc 2 st together).
- Sl st – slip stitch.
- […] – repeat the instructions given inbetween the brackets.
- (…) – total number of stitches
Bobble stitch (bo):
Yarn over, insert hook into the desired stitch, yarn over, pull up a loop, yarn over and pull through two loops on hook. Repeat the above instructions 4 more times in the same stitch. You will now have 6 loops on hook. Finally, yarn over and pull through all 6 loops. Basically we make 5 incomplete double crochet in the same stitch and pull through all remaining loops.
Pattern Instructions:
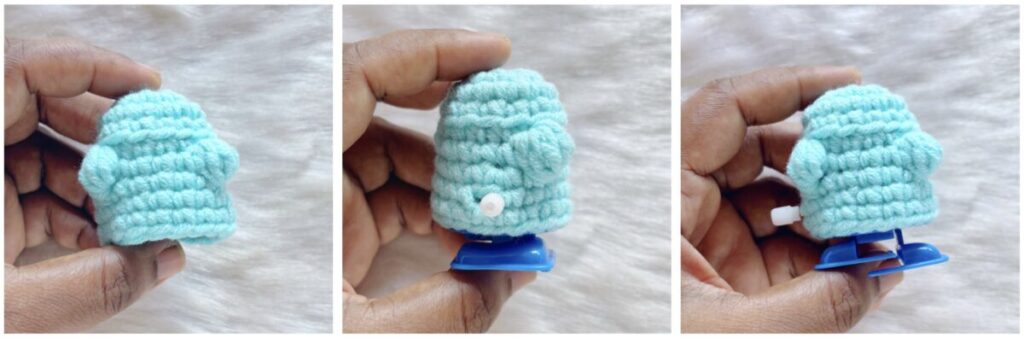
Body base:
Using light blue yarn,
R1: 8 sc in magic ring (8).
R2: Inc x 8 (16).
R3-4: Sc in each st (16).
R5: (BLO) Sc in each st (16).
R6: Sc 5, bo, sc 4, bo, sc 5 (16).
R7: Sc 4, inc, sc 6, inc, sc 4 (18).
R8: Sc 4, ch 1, skip one stitch, sc 13.
Place the body over the windup mechanism, aligning the ch-1 gap with the windup screw. Continue crocheting around both the body and mechanism.
R9: Sc in each st including the ch-1 space (18).
Fasten off leaving a long tail for sewing.
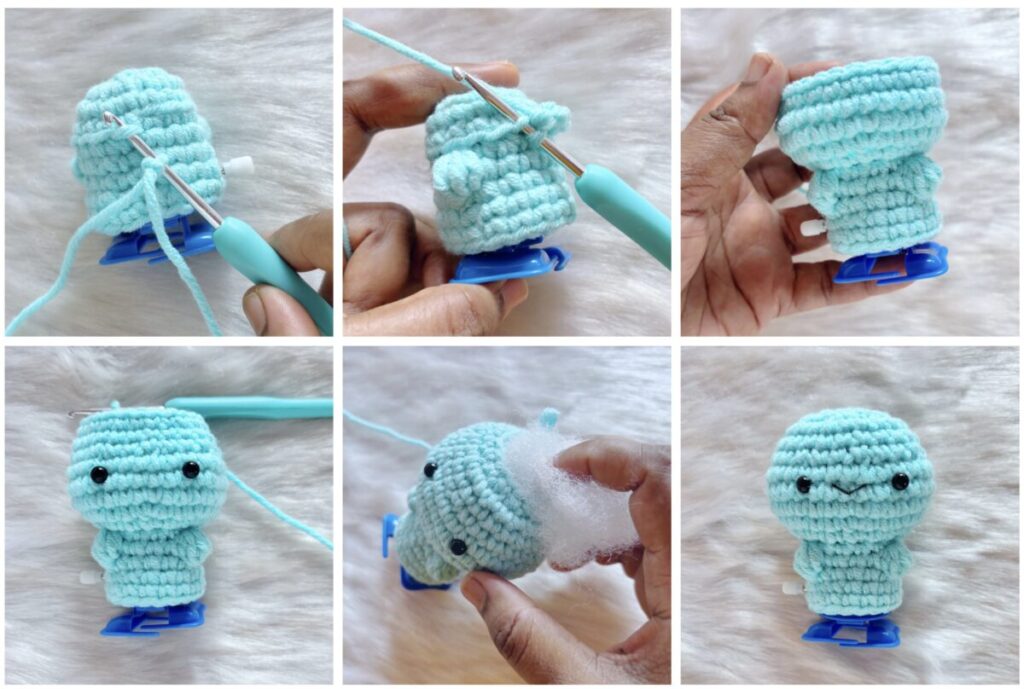
Head:
Join blue yarn to any front loop of R5, inserting hook from bottom to top.
Insert the hook facing up on the front loops of body made at R5.
R1: [ Sc, inc ] x 8 (24).
R2: [ Sc 2, inc ] x 8 (32).
R3-5: Sc in each st (32).
R6: [ Sc 2, dec ] x 8 (24).
R7 – 8: Sc in each stitch (24).
Insert 6 mm safety eyes between R5-R6, spacing them 5 visible stitches apart.
R9: [ Sc, dec ] x 8 (16).
stuff firmly.
R10: Dec x 8 (8).
Fasten off and leave a long tail. Weave the yarn tail through the front loops of the remaining 8 stitches. Pull tight to close the hole and weave in the yarn tail.
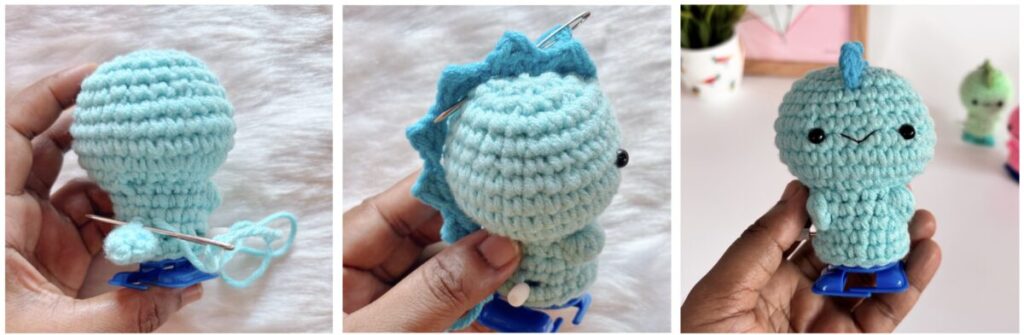
Tail:
Using light blue yarn,
R1: 4 sc in magic ring (4).
R2: [ Sc, inc ] x 2 (6).
R3: [ Sc, inc ] x 3 (9).
Fasten off leaving a long tail for sewing..
Spikes:
Using dark blue yarn,
R1: [ Ch 3, starting from second chain on hook, sc, dc in next ] x 7
Fasten off leaving a long tail for sewing.
Assembling:
Atttach tail to back of body.
Sew spikes along center of head and down body.
Embroider smile with black thread.
And there you have it! Your very own wind-up walking amigurumi Dino. I hope you had fun bringing your Dino to life. Happy crocheting!
Click below image to save this pattern on Pinterest
Looking for more cute makes?? Check below free patterns